
Replacing a Display on a Cambria Kiosk
- The purpose of this guide is to provide a walkthrough of the process of replacing a display on a Cambria kiosk.
- This guide is intended for the personnel responsible for configuring the kiosk.
- If you require any assistance past what this guide provides, please contact Versatile Credit Customer Support
- Email: support@versatilecredit.com
- Phone: 866-803-3369
- Website: versatilecredit.com (Contact Us)
Step-by-Step Guide
Locate two screws on the right side of the bracket. Remove these screws, and place them where they can be easily found. Once the screws are removed, you will be able to swing the display bracket open.

Open the bracket. Move the locking arm and place the end into the hole on the bottom of the right side of the bracket, as shown below.

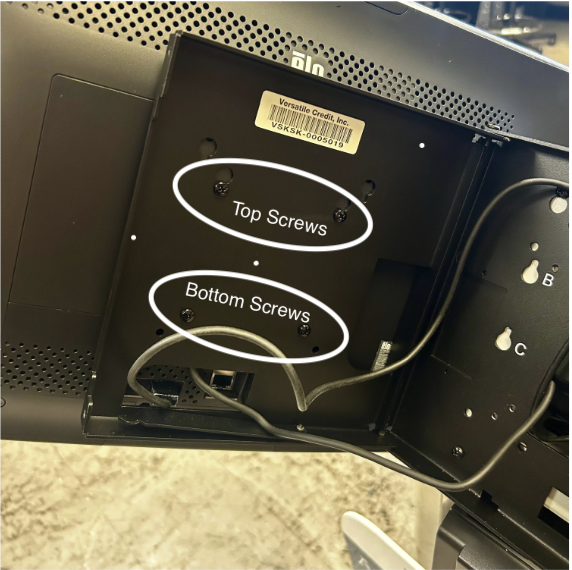
Remove the bottom screws from the back of the display. Partially remove the top screws until you're able to slide the display up and remove it from the bracket.
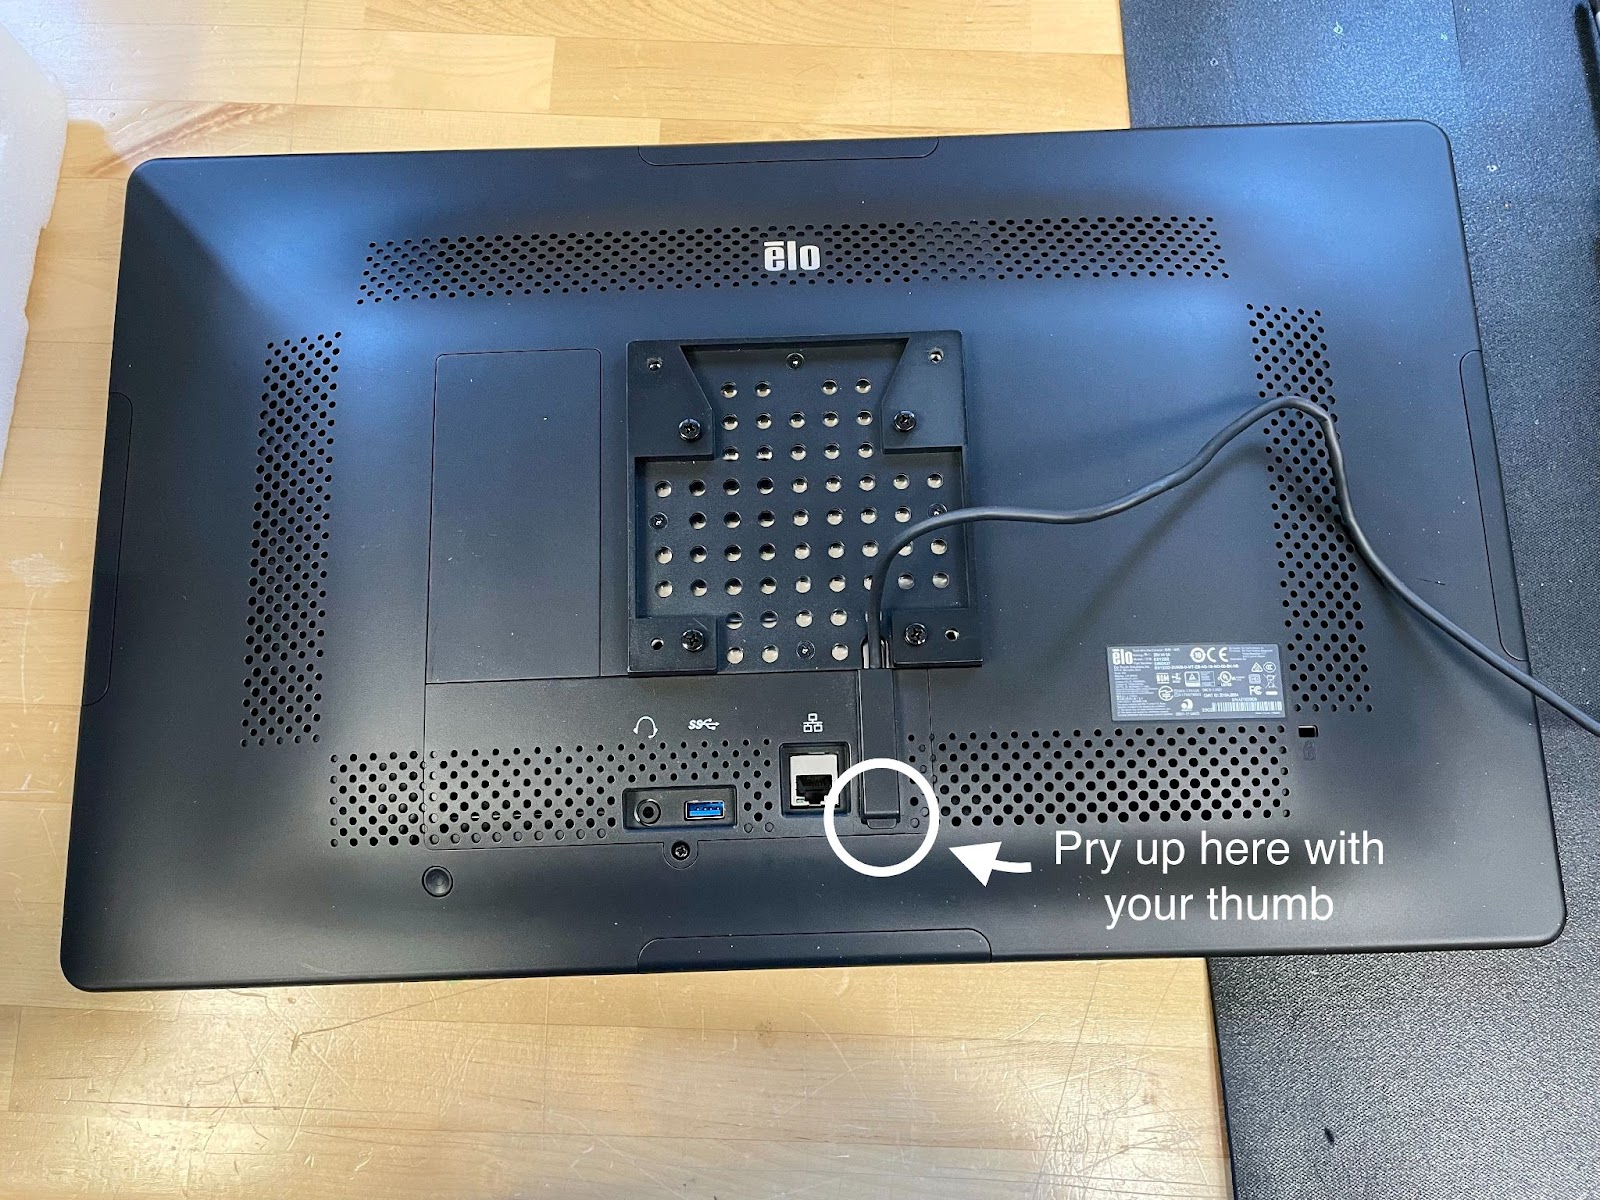
Remove the screw that holds the back cover of the display and pry open the back cover using your thumb.

Unplug the power cable, and place the old display on a flat service

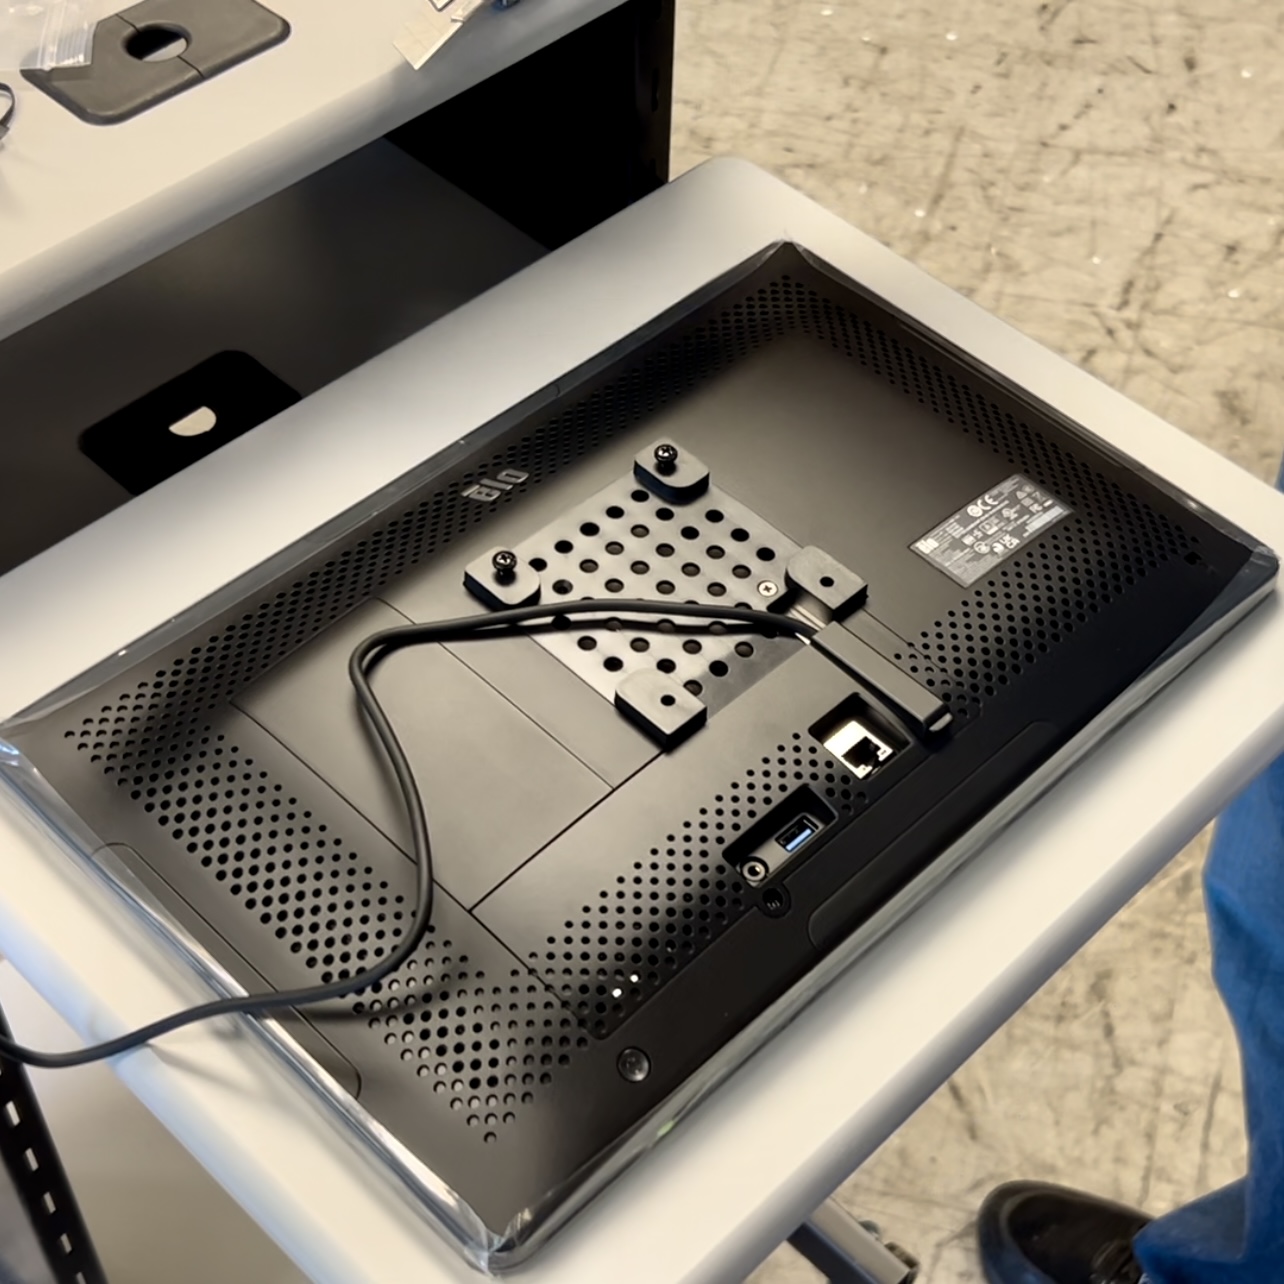
- Remove the back cover on the new display and connect the power cable. Replace the back cover, and put the screw back in.
Partially fasten two screws to the top holes of the display. Make sure they are in far enough that they don’t fall out but are not too tight and can’t go into the bracket.
Hang the display on the display bracket, as shown below. Make sure the power cord is coming down the channel on the back of the display and not pinched by the screws when you tighten them.
- Install and tighten the bottom two screws.
- Tighten the top two screws.
- Push down the locking arm and close the bracket. Ensure that none of the cords in the bracket get pinched. If it doesn’t close easily, one of the cords is likely being pinched.
- Once closed, replace the two screws that hold the bracket closed. (See step 1 for reference)


